
7/5/2025
Kids, I made my first sourdough.
Honestly, growing up, I had not been a fan of sourdough. But, I guess I just don’t like hard things in general. I don’t like crunchy, hard French bread, and the sourdough I had eaten was also crunchy and hard. At Fisherman’s Wharf, there was the renowned clam chowder in the bread bowl, which I recall being pretty good. But, I would only eat clam chowder and the white part of the bread. I looked it up, and the more proper term is the crumb. The crust would either be wasted or I guess my mom ate it. Things didn’t change until we ate homemade sourdough made by our friends from life group. A life group is a small group, and a small group is a group of people who study the bible together and fellowship together. But, I enjoy the term life group better because we are there to do life together. Anyways, the sourdough was not too hard, and the interior/ crumb was really soft. With the addition of butter and salt, it was delightful.
Over the last few or so months, I have made milk bread a few times, cookies once, and a few other desserts. I have finished reading Flour Water Salt by Ken Forkish. I’ve learned there are a lot of types of bread. I learned about all of the different hydration levels, leavening agents, and temperature control of the house and water. Then, I stowed the book away for a few months because it was a bit intimidating. The book had time schedules for different types of bread. It was really ,eye-opening though. Bread is hard to make. Bread is specific. Or, at least if I want it to be consistent it needs to be.
For my first sourdough I tried using an Alexandra Cooks recipe. I included a lot of her videos below. They are very short and straight forward. Maybe even more clear. But, obviously daddy is funnier.
Ingredients:
- 375g of water
- 100g of starter
- 11g of salt
- 500g of bread flour
Here’s how you make it, or attempt to:
- Make sure your starter is bubbling. If not, maybe feed it for another couple of days? And if you don’t have starter, you can ask around your friends and family for some. I wouldn’t suggest to start with making one yourself because it takes a long time and it takes a lot of flour. Each night, you have a little batch of starter, then you add equal amounts of water and flour to it. Ok, basically, you only keep like 1/4 of the final product and the rest is called discard. So, that is quite a bit of flour mixture to discard. This isn’t the 1940s when we have large surpluses of wheat to ship to foreign countries. I have been saving the discard to make other things in the future. Shoot. Wow. I’m still on step one. I’m either really passionate about this or in agony.
- In the morning, I added the water, starter, salt, and flour into a large metal bowl. I mixed it all together. The shape doesn’t really matter as long as all of the flour is mixed in.
- Cover it and let it rest for 30 minutes. If the house is cooler, then you may have to rest it longer.
- In the next two hours, perform stretches to it every 30 minutes. You can see how to stretch it here. So, four total stretches.
- Set aside again and wait for it to increase in volume by 50%.
- Take the dough out and put it on a lightly floured cutting board. Shape it into an egg yolk and let it result for 30 minutes. Make sure it isn’t too sticky after you shape. If it is too sticky, then you should add a bit more flour. But, just a bit. (I accidentally skipped step 6.)
- Prepare the bowl for proofing. Use a towel to cover a large bowl. Sprink some rice flour on. (I also accidentally skipped this.)
- Put it into the bowl and the towel should be covering it. Put it in the fridge for like a day.
- Remove it from fridge. Prepare some parchment paper. Place the dough onto the parchment paper and place it into a dutch oven.
- Score the top of the dough using a knife. She uses a razor blade. I use my razor blades for shaving.
- Put it into the oven at 450 for 30 minutes with the cover on. Then, uncover it and lower the temperature to 400 and bake for 15 minutes. Add more time if it doesn’t look golden.
- Let it rest on a rack for an hour.
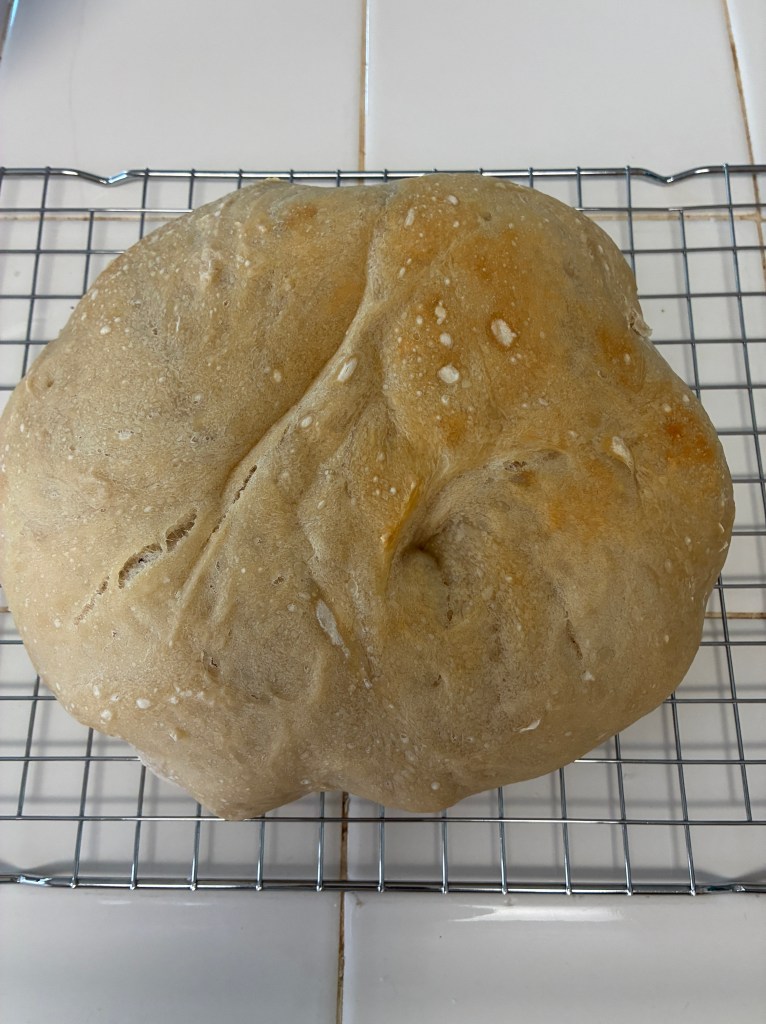
Result:
- I think that my starter wasn’t as vigorous as needed, so it was kind of flat.
- Or, it may have been because I mixed an ap flour starter with bread flour.
- Or, maybe because I forgot the step of flouring it the night before.
- Ah shucks. It stuck to the parchment paper. It is ok, I cut off the 1/4 that had the parchment and ate the rest. It was still good, but a little underbaked.
I got some discard from your grandma. I killed it the first time, but I managed to keep it alive the second time. So, progress.
Mommy was texting your grandma with all of my frantic questions. We asked what the difference between a starter and a discard is. We asked how to tell if the mixture is bubbling enough. Why is my dough so sticky? Thank you for answering them!
Definition from your grandma:
Starter: “you are generally either keeping on counter and feeding every day, or in the fridge and feeding 1x per week or so.”
Discard: “is the extra starter you remove from the doubled starter after feeding and allowing to rise.”
In actuality, I wish that I can ask my frantic questions to my own mommy. I wish that she had taught me how to control heat and how to pick the freshest vegetables. I wish that she taught me how to make all of the delicacies, so that I can share that experience with you guys too. No worries. I will consult my ever growing cookbook collection. They are bound to have some sort of answer.
P.S. I didn’t read the recipe beforehand again. One day I will learn to…

Leave a reply to wildlyloving8dd0e01e83 Cancel reply